![]()
![]()
![]()
![]()
![]()
![]()
![]()
![]()
![]()
![]()
![]()
![]()
![]()
![]()
![]()
![]()
Boat: Rhumb Do
Date: October 2011At anchor off Muara, Brunei.
PROBLEM: Clutch slip......forward gear engages, but increasing the engine revolutions results in the propeller shaft slowing down.
My boat is fitted with a Mercedes OM636 engine, coupled to a Hurth hbw 125 gearbox. The initials HBW stand for Hurth Borg Warner. Hurth gearboxes (German manufacture) are a common fitting on boats and have now merged (perhaps they always were the same company) with ZF Marine (Zeppelin Foundation) and the HBW 125 has been replaced by the ZF 12M - essentially the same gearbox but with optional gear oil cooling.
Gearbox Description: The engine is coupled to the transmission's input shaft (36), on which two gears are keyed, one at either end. A second shaft, the output shaft (66), has two more gears riding on it; one of these engages one of the input gears directly (44 - forward gear), and the other engages the second input gear via an intermediate gear which reverses the direction of the output shaft, and thereby gives reverse gear (65). These two output gears are mounted on bearings and rotate freely around the output shaft. The drive gears impart continuous forward and reverse rotation to the output gears. Each output gear has its own clutch, and between the two clutches is an engaging mechanism (60). Moving the engaging mechanism one way locks one gear to the output shaft, giving forward rotation; moving the mechanism the other way locks the other gear to the shaft, giving reverse rotation.
In a manually activated two-shaft transmission such as this, when the clutch-engaging mechanism is first moved to either forward or reverse, it gently presses on the relevant clutch. This initial friction spins a disc carrier (57) which holds some steel balls in tapered grooves. The rotation drives the balls up the grooves. Because of the taper in the grooves, the balls exert an increasing pressure on the clutch, completing the engagement. Only minimal pressure is needed to set things in motion, and thereafter, this clever design supplies the requisite pressure to make the clutch work, but without the need for oil pumps and circuits as in a hydraulic transmission.
My forward gear problem would have to be caused by either the balls in tapered grooves jamming, and therefore not fully engaging the clutch, or by the clutch plates (48 to 51) slipping. Reverse gear worked fine which sort of eliminated the ball and groove diagnosis and the clutch plates became the main suspects. It is possible to replace the plates, and a kit is commercially available. However, because of time constraints and being at anchor in what is known locally as 'lightning alley,' I really wanted to get the problem resolved as quickly as possible and a complete gearbox strip down, inspection, ordering of new parts, delivery and finally fitting them would take too long. I decided to just replace the entire gearbox with new and examine the old box at a later date. There was also a clattering noise coming from the box as the engine was switched off which indicated that the damper plate fitted between the engine flywheel and the gearbox input shaft was kaput, and this also would have to be renewed.
The Job.
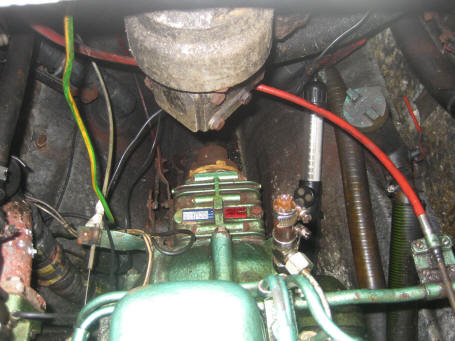
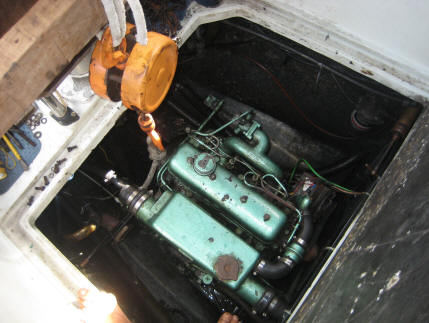
I've mentioned several times in my log that the only access to my engine is through the cockpit floor - there is no access at the front, rear, or either side. Furthermore, the steering pedestal protrudes into the under floor space reducing access even further. The picture on the right, looking down on the rear of the engine and the gearbox, may give some idea of the problem.
After first removing the gear change linkage, the fuel return pipe and the throttle linkage, I then had to undo the eight bolts securing the flexible shaft coupling and push the propeller shaft backwards (after ensuring the rudder was central and locked) to allow enough room to undo the six bolts holding the gearbox and mounting plate to the flywheel housing. This part of the job didn't actually take very long as I had renewed the shaft coupling only a few months ago.
The prop. shaft flexible coupling removed The gearbox and mounting plate removed.
The new gearbox was delivered from the UK (my special thanks to my friend Rob for this!) and was in 'bare' condition. So while that and the mounting plate were being paint sprayed ashore, I turned my attention to the damper plate. A mirror inspection revealed that only a half of each of the six securing bolts were visible, preventing the use of a socket. Ring spanners could not be used either because of the protruding 'spline' centre section. In any case, measurement of the new plate showed that the aperture in the flywheel housing was too small to accept the plate, and that the flywheel housing would also have to be removed, along with the exhaust pipe. As the housing also incorporates the rear engine mountings, I had to borrow a chain hoist from the Royal Brunei Yacht Club to take the weight of the engine while I removed the housing. Once this was off, it was a straightforward job to remove the old plate which had a completely shattered polyurethane central section, and replace it with the new plate.
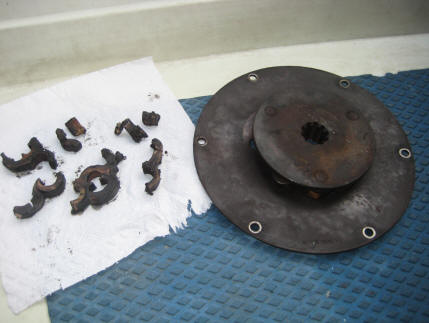
The old damper plate inside the flywheel housing and with it's broken polyurethane shock absorber.
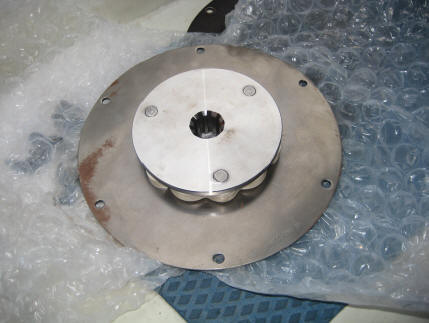
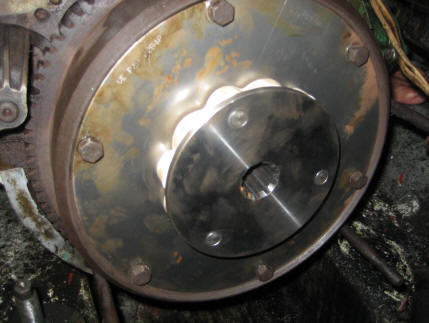
The new damper plate................fitted to the flywheel (complete with oily finger marks!)
Once the damper plate had been renewed, the flywheel housing could be refitted and the engine lowered back onto it's mountings. The new gearbox and mounting plate (now painted) could be fitted next.
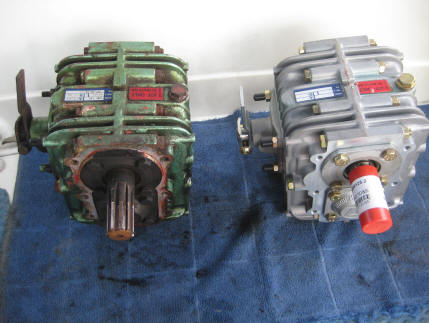
Old and new gearboxes. New gearbox paint job!
Once the gearbox was in place, it was a case of aligning the output flange with the propeller shaft flange, bolting the flexible shaft coupling back in place and reconnecting the Morse controls and exhaust pipe. Finally, the alignment needs to be checked again with feeler gauges and adjusted accordingly.
On my boat because of the access problems, engine alignment is a very difficult part of the job and one which I will not describe on this page.
So......gearbox changed while at anchor!
My grateful thanks to Rob in Yorkshire for locating a new gearbox (cheaper than I could find on our limited internet), and for sending it out from the UK to Brunei.


.JPG)